

Guides
Starter Guide
Choose your game mode, secure your account and use the Adventure Guide to build your first training and reward route.
Guides
Choose your game mode, secure your account and use the Adventure Guide to build your first training and reward route.
Follow the Mountain Guide's introduction, choose whether to take the tutorial, and then select your game mode. Read the mode description before confirming: XP rates and trading restrictions affect your entire progression route. Swift is the default selection, at 50x XP; Game Modes compares every current choice.
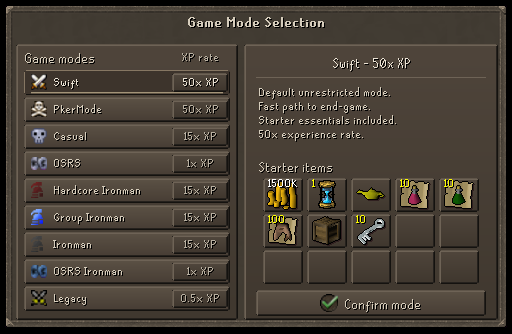
Standard accounts receive coins, supplies, a starter weapon pack, an XP scroll, an experience lamp and Frost keys. Ironman starters include basic melee, ranged and magic equipment, runes, food and the starter weapon pack. Unnote food before combat. Starter allowances are limited, so creating additional accounts does not guarantee another full kit.
::pin. Add and verify your recovery email in the website dashboard; check its Ruby package reward status and use ::claim once queued. See Account Security.::vote, complete the available sites, and use ::voted after the confirmations arrive. A four-vote claim also gives a basic Auto-Level scroll.::home, bank supplies and buy appropriate upgrades. Ironman accounts use their permitted shops and self-earned items.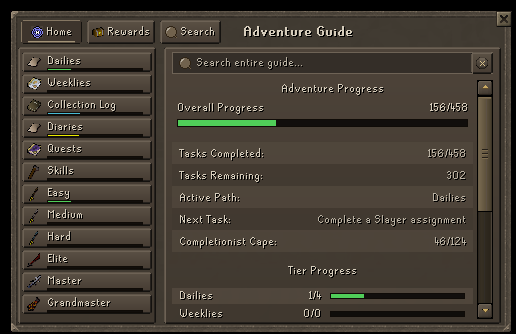
The guide brings together Dailies, Weeklies, Collection Log, Diaries, Quests, Skills and permanent tasks from Easy through Grandmaster. Search for an activity, inspect its requirements, and return to Rewards when you have completed a goal. See Adventure Guide for task resets and claiming.
Use the Teleports orb beside the minimap. Its categories are Favorites, Bosses, Monsters, Skilling, Games, Wild, Dungeons and Other. Search within the menu instead of relying on old home-area walking directions. Check access requirements and Wilderness warnings before confirming a destination.
At home, use the bankers, shops, Vote Shop and Slayer NPCs as needed. Eligible non-Ironman accounts can buy and sell through the Trading Post; new-player restrictions normally last the first 15 minutes of playtime. Group Ironman players trade within their group rather than through the public exchange.
Use ::commands for the commands available to your account. For help with a specific activity, search this wiki or ask in game.